CloudX Time Lapse and Status Monitoring Portal - User Manual
CloudX User Manual Index
- 1. Introduction
- 2. Account Creation, Login and Overview
-
3. CloudX Subscriptions
- 4. Status Notifications
- 5. View Images
- 5.1 Download your images in bulk
- 5.2 I don't understand the filenames?
- 5.3Upload external images to CloudX
- 6. Generate a timelapse video
- 7. Schedule automatic timelapse video generation
- 8. Device Settings Menu
- 9. Setup Public Viewing
- 10. Connecting with UpBlink
- 11. Connecting with BlinkX
- 12. Connecting with Blink
- 13. Frequently Asked Questions (FAQ's)
1. Introduction to CloudX
This manual describes how to get started with CloudX for your UpBlink, BlinkX, or Blink device. CloudX is a state of the art online time lapse platform, allowing you to monitor your time lapse camera remotely.
A subscription to the CloudX-Lite service is available on BlinkX and Blink to provide the ability for remote status monitoring of your camera, remote firmware updates, as well as daily email status messages to know your system is still online and working to provide that peace of mind.
A subscription to the CloudX-Pro service is currently only available on UpBlink. The Pro service, which includes the Lite features, also allows for automatic image uploads and generation of a time lapse video with a click of a button.
Our CloudX service will also ensure that the camera time remains accurate by synchronizing the clock with an NTP server each time the device is connected to the internet to send information to CloudX.
2. Account Creation, Login and Overview
After programming your time lapse controller (UpBlink/BlinkX/Blink( to access CloudX, your CloudX account will be AUTOMATICALLY created. You will receive a welcome email to setup your login account to CloudX where you can view your devices.
Please review our setup video here on how to setup you device to connect with CloudX including automatic creation of your account.
Once you receive your welcome email, the CloudX login page can be found at: https://portal.cam-do.com. Simply click Login.

From the CloudX login page, enter your email and password used to setup your UpBlink / BlinkX / Blink device.
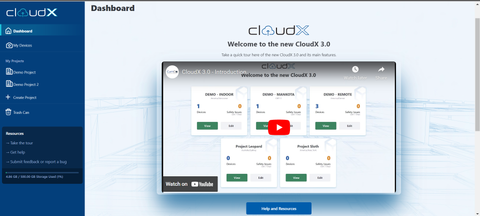
Once logged into your personal CloudX account, you will be presented with the following overview page, called "My Devices and Statuses".
The left-hand sidebar contains a list of your connected devices. Clicking the "View Images" button next to the device will allow you to view your uploaded images (CloudX Pro only) and recent camera status.

Clicking the "View Schedule" button next to the device will allow you to view the current schedule settings programmed on your device.
3. CloudX Subscriptions
Each CamDo device (UpBlink, BlinkX, Blink) includes a 4-week free trial before requiring a subscription to continue the service. The trial period will begin when a new device has connected to CloudX for the first time. Once a device has connected to CloudX, it will become registered to the email address that was entered into the device for intial connection to CloudX. If you do not have a CloudX account associated with the email address, you will be sent a CloudX account activation email within 10 minutes of your device successfully connecting to CloudX. Note, each device registered would require a subscription in order to upload images to the CloudX account. The storage capacity is shared between devices, if you have multiple registered to your account.
If you are having trouble, please review the video under Section 2 above.
Once you reach the end of your free trial, a subscription to CloudX can be taken out right inside CloudX. On the "My Devices" page, click on "Device Settings" button next to the device.

Then click on "Manage" under "Device Subscription".

Then just select the subscription that suits your needs and hit the "Pay Now" button at the end. This will setup a monthly subscription, which will bill every 31 days starting from the day you set it up.

Once your project has finished, you can reach out to support@cam-do.com to process the cancellation of your subscription.
What if I don't want to use a monthly subscription?
If you do not want to take a monthly subscription, you can purchase a block of 3 months or 12 months at a time via our website. If you take this approach, please make sure to contact support@cam-do.com to request to apply your subscription. There is no automatic linking right now (we are working on it!).
3.1 Transaction History
Once you have set-up automatic payment for a subscription, you can view your transaction history. Click on "My Account" button from the upper-right corner at the top of your account page.

From here you can see the transaction dates, subscription tier, and which device the subscription is applied to.
4. Status Notifications
When your device has connected to CloudX, it will upload status information that displays the camera information since the last connection to the server.
The information can optionally be emailed to a set of email addresses at specific times/days (see below to set this up).
Our CloudX service will also ensure that the camera time remains accurate by re-synchronizing the clock with an NTP server each time the device is connected to the internet to send information to CloudX.
4.1 Email Status Notifications
To setup notifications to be emailed, simply click on the "Device Settings" button from the "My Devices" page.

Scroll down to the Email Notifications section. There are several options here depending on what events you wish to receive an email for. If you want multiple email addresses to receive the email, simply separate multiple addresses using a comma.

Alternatively, the status email can be sent at a specific time of day. The time of day that the email is sent is based on the timezone you select (default is Coordinated Universal Time (UTC)). You can update your timezone further up the same Device Edit page.
Finally, remember to hit the Save button down the bottom.
5. View Images
If you have a CloudX Pro Subscription (currently only available for UpBlink), images that have been uploaded to CloudX can be viewed from the images page, accessed via the view images button as follows:
To view all images captured between set dates, use the filter button as follows:

Clicking on an individual image will display the image and various details about it.
There are also several different views to help navigate, available in the top right. Flipping between list view and thumbnail view can help you find what you need quickly.

The default view is thumbnail/grid and list view can only show up to 100 items.
5.1 Download your footage in bulk
You can download your images in bulk from the same image viewing page. Simply click on the green "Actions" button followed by "Download Folder". This will create a .zip or .rar archive that you can then download. Generated .rar files will be broken up into 4GB archives to make the file management more reliable.
Once you have downloaded the .zip or .rar file, you can use any unarchiving tool to open these files. Here are some recommendations:
- 7Zip - free unarchiving tool for Windows. Supports .ZIP and .RAR
- WinRAR - trial versions for Windows and Mac (Mac is command line interface only). Supports .ZIP and .RAR
- WinZip - has a trial version for Windows and Mac. Supports .ZIP and .RAR
- Keka - free unarchiving tool for Mac. Supports .ZIP and .RAR
- The Unarchiver - free unarchiving tool for Mac. Supports .ZIP and .RAR
Note, even though it is a multi-part archive, the source files are from a single folder and therefore the extract path should be the same. Choose the option from your chosen unarchive tool that will extract locally i.e. no path. You would only need to open and extract the first .rar file, which will then extract all the images from the other .rar files.
Note as there can be many images involved, it can take a little bit of time for the service to create the archive. You will be emailed when ready (typically less than 15 mins). It will turn up in your CloudX account next to your images for download. 
If you do not want to download all images, simply create a folder also under the green Actions menu, filter the images by date using the "Filter" menu, then move the images again using the "Action" button to "Select all items" then "Move" the images you want to download into that folder. Right click and hit "Download folder" or again use the "Action" button.
5.2 I don't understand the filenaming?
CloudX renames the normal camera filenames when the files are uploaded (original filenaming is retained on the SD card). The filename is basically a datestamp in the format YYYYMMDDhhmmss.JPG.
eg a filename of say: 20211006091025.JPG can be read as 2021-10-06 9:10:25 ==> which means it was taken on the 6th October 2021 at 9:10AM (and 25 seconds). The advantage is that when it comes to ordering files in your file manager, you can just order by filename and you will get everything in shoot order. It also means when you build a timelapse, the program you are using will read the files sequentially in shoot order.
5.3 Upload external images to CloudX
To upload images from an external source, you can drag and drop the image from your file manager onto "Account Home".

A pop-up window will then appear, which will allow you to add more files.

Once done adding files, you can click on the "Upload Queue" button. This will prompt CloudX to process the upload of the files, which can take a few minutes depending on how many files and their size.
6. Generate a TimeLapse Video
CloudX allows for automatic and manual generation of a time lapse video from your uploaded images. When viewing your images, simple click on the Create Timelapse" button at the top of the page.

You will then need to make a few choices on the next screen as follows:

Referring to the screenshot and associated numbering above.
1. If you have multiple CamDo controllers, make sure to select the correct device from the dropdown selector. You can also change the folder if you want but ordinarily there is no reason to change this.
2. Select the timeframe you are interested in. If you want to customise the range, simply hit the last option "Date Range" to further customise.
3. Advanced options allows you to limit photos by time during the day (eg to exclude night time shots), exclude weekends and also skip every "Nth" image if you want to include less frames (eg you shot at every 5 mins but only want to create a timelapse at 10 min intervals, you would select "Include every 2nd image".
4. The default render order is oldest to newest. Generally there is no need to change this.
The default framerate is 30fps. You can use the dropdown to adjust this to speed up or slow down the generated timelapse. eg 15fps will be half the speed of 30fps.
The default quality is compressed. Select 'Original' if you wish to increase the quality, however be aware this can create very large files due to the potentially large number of images involved.
5. At the bottom, there is a count of the number of images to be included in your timelapse. If this reads "0 images", change your selection re timeframes above. You can see that we chose the last 6 months which resulted in 8601 images being selected. At 30fps this will create a video that is 8601/30 = 286.7 seconds long. Change the "Nth" image option under Advanced or increase the frame rate to shorten the video if you need to.
Finish up by clicking "Create Timelapse". It will take a few minutes to render the video and you will be notified via email and also via the notifications system within CloudX (top right in menu bar) when the video clip is ready for viewing.
All videos that have been generated can be viewed from the main image viewing page by clicking into the "timelapse" folder.
7. Schedule automatic timelapse videos
CloudX can automatically generate a time lapse videos daily, weekly, fortnightly or monthly. Note: If you set automatic timelapse video generation up at Sunday at 1pm and select "Weekly" you will receive the next video in 7 days time ie the following Sunday around 1pm.
The options are very similar to the Manual Timelapse option described in Section 6 above. The only difference is a custom date range is not available as this option does not make sense when the end date is constantly changing.
Simply go to Device Settingd as described in the preceding sections, and scroll down to the "Automated Timelapse" section which looks like the following. Select your options and hit Save at the bottom. You will receive an email every time the video is created.

The latest video generated can be shared externally using a static link as indicated in Section 8.1 Static Link to View Only Latest Image or Video as well as displayed on the device's timelapse folder.
8. Device Settings
Click on the "Device Edit" button (small "pencil" icon as shown below) from the "My Devices and Statuses" page.

Device Name: How you want to refer to your device.
Sharing Options
Sharing Title: An external facing name for the site or view for when you share links to your photos or timelapse videos (see Sharing below).
Integrations: This provides the ability to link into construction platforms such as BIM360, Procore, PlanGrid and CMIC. Our YouTube CloudX channel provides further guidance on using this.
Note: If using Procore, please ensure to install the CamDo App connection from the Procore Marketplace here: https://marketplace.procore.com/apps/camdo-solutions-timelapse.
Also checkout: Procore, BIM 360 and CMIC Timelapse Platform Integration
8.1. Sharing using static link to view the latest Image or Video
Navigate to the Sharing section and copy the URLs provided there to share your latest footage.

You can use a link that will always display the most recent image captured by your device, or the latest video that has been generated on your CloudX account. This URL link either be a direct link to the file or can be a shareable web page. If you use the web page option, make sure to upload your logo under the "Account Settings" button in the top menu bar to provide customisation.
For the individual image file option, you can select different image sizes using the dropdown box against "Latest Image File Url". This provides flexibility when embedding in other sites.
9. Setup Public Viewing
CloudX provides various ways to share your account footage with privacy settings to keep your content secure.
- Share the entire account - all cameras, projects and associated images
- Share an individual project - all cameras and images for a single project
- Share an individual camera - a single camera and its images. This means the user cannot see other devices on a project.
- Share an individual file - just one file
Update share page logo
Note, CloudX allows you to also upload your own logo, so when you share the web page to your client, it displays your branding, replacing the CloudX logo (not for guest sign in). If you use the share URL web page options, you may upload your logo to replace the CloudX logo when using share pages
Navigate to Account Settings (logo top right hand corner).
Scroll down to the "Public Sharing Image" section to upload your own image. When viewing share pages, the default CloudX logo will now be replaced with your personal logo.
9.1 Guest Sign In - Sharing the entire account as read-only
The way this is achieved, is by setting up a 'secondary' guest password to your account. This secondary password can then be shared with your client/colleague to login.
This allows a client/colleague to login to your account as a read-only user. They can view the footage for all cameras and projects but as a read-only user cannot edit files, folders, or subscriptions. Payment information regarding subscriptions is also hidden.
- Click the avatar in the top right.
- Select "My Account".
- In the account settings page, select "Enable Guest Password"
- Set a guest password.
- Click the Save button at the bottom of the page to confirm your changes.
The "guest login name" (or your account email address) and guest password can now be shared with your client/colleague.
Navigate to: https://portal.cam-do.com/login.html, click on "Guest Sign In", enter the guest name and guest password.
9.2 Folder Share Privacy
Each folder's privacy level can be individually set to hide or display each subfolder within the parent project/directory.
A folder/project can be set to one of three viewing privacy levels:
 Private
- This folder/project will not have a share URL.
- Navigation to this folder and any camera stats will be hidden from the parent folder's share page.
 Password Protected
- The share URL will require the password to be provided before allowing viewing access.
- Navigation to this folder will be displayed in the parent folder/project’s share page, but viewing access will be restricted until the password is provided.
 Public
- If the parent folder/project is password protected, the share URL will inherit the password of the parent folder.
- Navigation to this folder will be displayed in the parent folder/project's share page.
9.3 Sharing an entire project
This option shares all cameras and images for a single project.
- Select the Project in the lefthand sidebar.
- Click Project Settings
- Scroll to "File Privacy"
- Select "Public" or "Password"
- Click Save
Once set to either Public or Password Protected, the "Sharing URL" will be displayed and can be shared with your client/colleague.
Each folder of the project can be toggled between displayed or hidden by adjusting each folder's Share Privacy level.
Scroll to the “SubFolder Management” section to see all folders within the project. Then click the cog icon in the Share Access column to edit a folder.

9.3.1 Project share customization
Image view type
When sharing a project, you can optionally adjust the file display type between the image player or grid view.
Device map
If device locations are set, each device location marker will be displayed on the map. If no devices have a GPS marker set, the project location marker will be displayed.
Device list
Device cards, similar to your account’s project device list page, will be displayed but will not include any CloudX subscription information.
9.4 Sharing a single camera or folder
This option shares a folder and all its images. This means the user cannot navigate back to the parent to see other cameras on a project.
Folder Share Privacy can be set from the "Edit Folder" menu. If the folder is set to Public or Password Protected, the share URL will be displayed.

To open the "Edit Folder" menu:
- If viewing the folder to be shared, click the actions button and select "Edit This Folder".

- If viewing the parent folder listing, right click the folder to be shared and select "Edit Folder".

9.5 Sharing an individual file
Open the file viewing modal by double clicking the file or right clicking it and selecting "view file", then copy the "Share URL".
10. Setup for UpBlink
For more videos on CloudX, visit our YouTube channel playlist for CloudX.
11. Setup for BlinkX

To complete the initial configuration for CloudX-Lite, you must have BlinkX firmware v3.01 or higher. BlinkX has the ability to setup a scheduled email notification every day*. In order to use this feature, BlinkX must be near an active WiFi network with internet access.
The email notification will send the following information:
- SD space remaining
- GoPro Camera battery life (does not display external battery capacity)
- # of photos and video taken since last email
- # of motion detection events since last email
- # of camera on events since last email
To receive the email notification, click the checkbox to expand the settings. Input your WiFi network information as well as the email address you wish to receive notifications on. Adjust the notification time as desired, then click the "Enable Email Notifications" button so that the schedule becomes highlighted blue indicating that it is active. Ensure to click "Save All" after adjusting any schedules.

*NOTE: Email notifications require a subscription in order to be activated. CamDo offers a trial subscription of 2 weeks when you first configure the notification.
12. Setup for Blink
Further detailed information is available in the Blink manual.

To complete the initial configuration for CloudX-Lite, you must have Blink firmware v3.00.01. or higher. Blink has the ability to setup a scheduled email notification every day*. In order to use this feature, BlinkX must be near an active WiFi network with internet access.
This notification will send the following information:
- SD space remaining (HERO4 Only)
- GoPro Camera battery life (does not display external battery capacity)
- # of photos and video taken since last email
- # of motion detections triggered since last email
To enable this notification, click the checkbox to expand the settings. Input the WiFi settings as well as the email address you wish to receive notifications on. Adjust the time as desired, then click Save All.

*NOTE: Email notifications requires a subscription in order to be activated. CamDo offers a trial subscription of 2 weeks when you first configure the notification.
13. Frequently Asked Questions (FAQ's)
What does Upload All Photos mean?
"Upload All Photos" means upload all photos that haven't already been uploaded.
Upload All Photos will result in Photo 3 being uploaded followed by Photos 1 and 2 if you have a backlog.
The unit will always upload the most recent photo first, and then subsequently upload the older images. There a few reasons for this:
- So that you always get the latest photo and can see what the site status eg lens isn't dirty, etc.
- If you have a network fail or you hit the upload timeout limit and not all images get uploaded, then the unit could fall behind from an upload point of view - the logic is that you want to see the latest photo first and then the unit proceeds to catchup with older images.