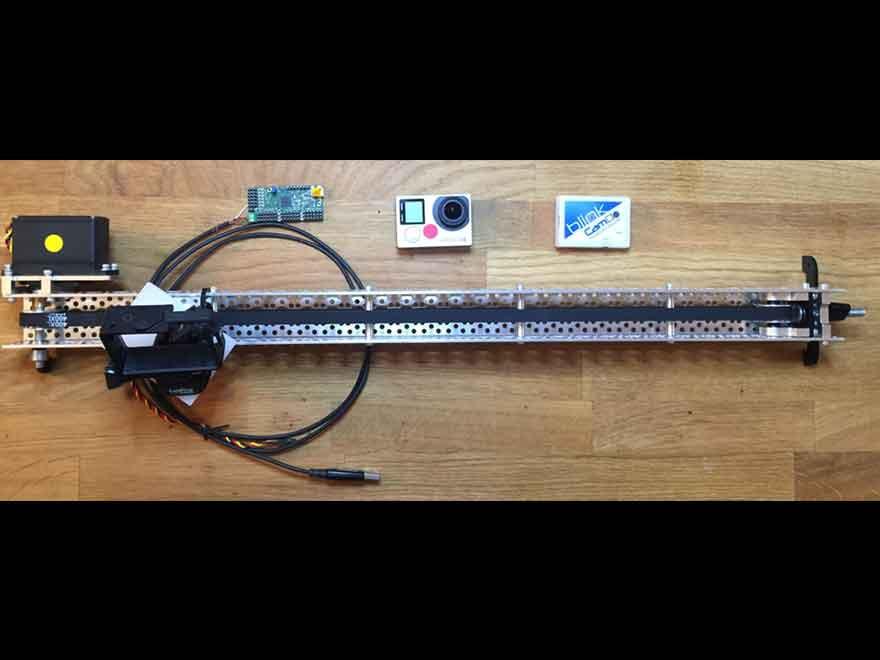
Although most of our customers want to create long term time lapses, there are a number of professional photographers who want to create more artistic, short time lapses. A nice feature of a short time lapse (interval≤1min) is that you get the feeling of movement due to the subjects (people, cars, etc) appearing in more than one frame. This effect can be heightened by adding a motion control rig to track at a slow rate while the camera is shooting. There are two types of slider rigs that could be used: linear (dolly) and rotary (pan/tilt). Some rigs utilize a combination of both.
I figured I would try out this effect by setting up a camera in our office for the day. I chose to go with a linear motion control rig, although there are some easy ways to add rotary motion effects by strapping your camera to a simple egg-timer. Here are the materials I used:
The Setup
First things first, I needed to select the length of the shoot and interval between shots. I headed over to ourTimelapse Calculator and plugged in the necessary variables. I chose a shoot time of 1 day, 8 hours per day, with a 1 minute interval. That gave me a clip length of 16 seconds with 30fps. I then checked how long the battery will last by scrolling down the page and selecting an 1180mAh internal battery and None for external battery. This yielded an approximate battery consumption of 0.8 days (19.2hrs). Even with standard battery degradation, my camera will easily handle the 8 hour load necessary for this shoot.
Next, I set a 1 minute intervalometer schedule for Blink to start at 9am and end at 5pm, every weekday (See image below).

Finally, I had to setup the linear rig to slide from side to side at small increments. Since there are many different types of rigs and controllers I won’t go into detail on this one in particular. You just need to ensure you maximize the length of the slide so that the images start at one side and end at the other.
The Shoot
I made sure the camera’s internal battery wascharged fully before shooting (a simple mistake I’ve made more than once!). I went in early on the day of the shoot to setup, althoughBlink will allow you to set a schedule up to a week before.
I then picked a location that had good visibility but would also not be touched or shuffled throughout the day. This is a critical step as any slight shift in the rig will cause unwanted discontinuities in the video. I plugged Blink into the camera and waited for it to sync it’s time with the camera’s internal time. Then, I plugged the servo controller into a permanent power source.
For those who want additional feedback that the shoot is going well, you can schedule aBlink Email Notification which will send an email to indicate how many images were taken. Of course, a WiFi connection is required for this feature.
Now off to the work day!
The Post Production
Now that I have all the images, it’s time to create the time lapse. I used this great article by Dean onHow to Create a Time Lapse in order to compile the footage. Here are the results:
Exciting stuff, right? Unfortunately the rig got bumped halfway through the shoot so I only captured half of the images. Either way, I wasn’t missing much action. Go ahead and try it out and send us some footage that will put my video to shame!


