
Time lapse photography allows you to capture many hours or even years into a couple of minutes of video. But to get it right there are a number of key issues that need to be considered in planning your shoot. Don’t be afraid, it’s all common sense, we just want to help maximise your chances of time lapse success!
This blog post focuses on what time lapse settings to use with your GoPro camera, to assist in planning your shoot.
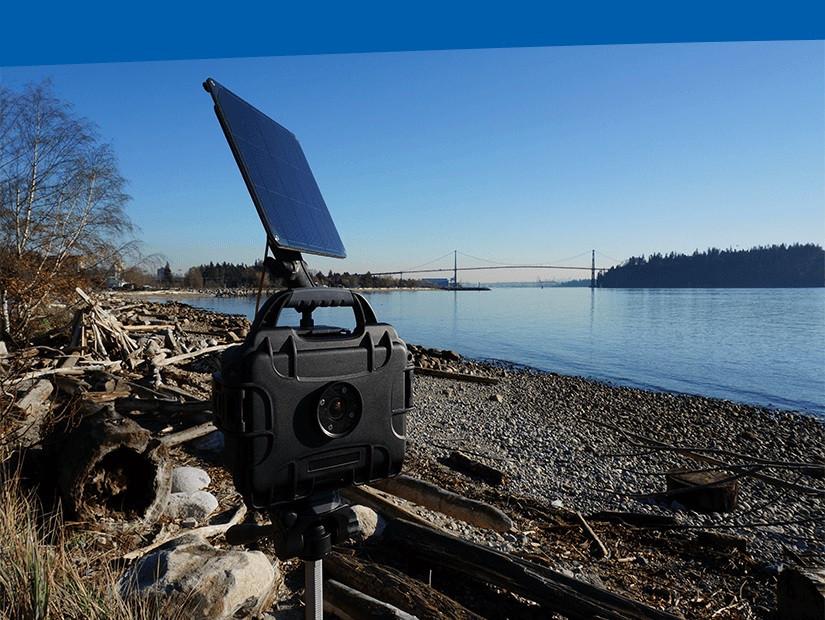
Planning your shoot - key issues
There are a number of key issues in planning your shoot. This post focuses on the following:
- Composition
- Time Lapse Calculations
- How long is the activity - hours, days, months or even years?
- Length of Clip
- Interval between shots and suggested settings
- How many frames are required to achieve this?
- How much memory do I need?
- How much power will I need?
- Camera Settings
Composition
Composition is key to making your final time lapse impressive and compulsory viewing. You can get all the technical stuff right but if your camera is pointing the wrong way or poorly framed, the results will speak for themselves!
So make sure you scope out your location and take some test shots to see how it will frame up at the end. If using the GoPro camera, the camera’s WiFi can be used with the GoPro App to preview the angle and field of view for each image on your phone/tablet. Whilst you are at it, check what the average size of the photos are to help in checking your memory storage requirements (discussed further below).
Time Lapse Calculations
There are a number of variables that need to considered in planning out your shoot. This includes:
- How long is the activity - hours, days, months or even years?
- Interval between shots
- Length of Clip
- How many frames are required to achieve this?
- How much memory do I need?
- How much power will I need?
To help make this a bit simpler, CamDo has a simple but powerfultime lapse calculator to guide you through it. We highly recommend reading through the information below and usingthe calculator in parallel.
How long is the time lapse session?
This is self explanatory but is the number one thing to get right. Monitoring a construction site over many months or years is very different to capturing the growth or movement of plants over a few hours or days to capturing the weather roll in one afternoon and star movement over night. This then plays into how long to set your interval between shots.
Interval between shots
Different scenes or activities require different intervals to capture the action to the required detail for your photographic project. Ultimately capturing as tight an interval as your SD card and power budget will allow gives you the greatest flexibility at the end in post production. If the spacing between shots is too long, you can also get jumping - where an object in one shot has completely disappeared in the next. Not a big deal, just something to to consider.
Some suggested time lapse interval settings for different applications are as follows.
Please don’t just take these for granted, think about your scene and what’s going on (or about to go on!). There is plenty of variation to this that will still look good. And of course there is plenty of subject matter not covered here -melting ice, rotting fruit, rising bread...
1 second intervals:
- Fast movingweather ie clouds
- Traffic
- Driving
Slightly longer - up to 3 second intervals:
- Slower moving clouds
- Trees in the wind
- Crowds of people
- Sunrise / Sunset
15 – 30 second intervals:
- Moving shadows
- Sun tracking across sky (no clouds)
Longer Intervals:
- Fast growing plants (3 - 10 min). Check this blog post where the interval was a bit too long. Obviously depends on the species of plant.
- Stars (15 – 60 seconds)
- Construction projects (15 - 120 min). Due to the long term nature of construction, different phases happen at different speeds so you might want a 5 min interval as a crane erects structural steel. 60 mins for slow excavation, etc.
Check out our time lapse blog posts here to get an idea of the effects you can achieve at different intervals.
Length of Clip & Number of Frames
This comes down to what you intend to use your time lapse footage for. If it is to create a marketing campaign, then you probably have a target video clip length. If you are trying to capture an event or series of events such as construction time lapse, then you might be more interested in the interval between shots to make sure you are catching the appropriate footage rather than the final clip length. This might be similar if you are capturing the growth of plants or seedlings - you need to set a tight enough interval to capture the changes occurring. The frame rate can always be increased/decreased at a later time and the video clipped in post production.
Either way, you should think about how long the video clip might be to make sure you capture enough frames. Remember standard frame rates are 24fps or 30fps. So a five minute clip at 30 fps would require 300 seconds x 30 fps = 9000 photos! On a construction site taking a photo once an hour, this equates to 9000 working hours. If a typical construction site is working from 7am to 4pm, that’s 9 hours a day. So 9000 working hours equates to 1000 working days which is almost 4 years! If you decided to take one photo every 15 mins then we are back to 1 year. A good option is to push the frame rate down to 10 fps to slow the action down, which for our example above is only 3000 photos. That’s the beauty of using a tool like theCamDo time lapse calculator.
There are also other tricks like bringing down the frame rate that we discuss later when you build your images into a video so that you need less shots but you still get the length. You can see though from this example the importance of planning it out as numbers can multiply our dramatically.
Memory
Again using our example above, 9000 images at an average of 5 - 6MB per photo (fairly typical for a GoPro HERO4), we are looking at 54 GB of storage. So a 64 GB card would be good. We always recommend checking in more frequently to make sure all is well and to take images off the card as an insurance policy, especially for long term projects.
Take some test shots and check the average image size for your camera and your scene as it can vary dramatically. Again the CamDo time lapse calculator helps you out with this.
GoPro Camera settings
The right settings for the right scenario is key.
Time lapse flicker occurs when due to exposure changes, adjacent images look brighter or dimmer than the general average. This however can be combated via appropriate camera settings. The new GoPro HERO4 firmware update (V4.00+) has introduced some new settings which definitely help with taking higher quality time lapse footage with less effort to post-process. Specifically in ProTune mode, the new firmware:
- adds additional White Balance settings to allow for finer adjustments when optimizing for cool or warm lighting conditions. Available for videos and photos.
- adds additional ISO control settings. Adds additional ISO options, adds the ability to lock the GoPro ISO setting for video and set an ISO range for photo capture.
- less relevant but good to know is the ability to lock the shutter speed for greater control under different motion and lighting conditions. The Shutter setting is however only available for videos.
Flicker can also be dealt with in post production but avoiding it in the first place is the goal.
ISO, White Balance, Shutter Speed and Aperture
For a GoPro, use ProTune mode to enable manual control of White Balance, Color, ISO Limit, Sharpness and Exposure Value Compensation for more advanced control and customization of your video footage and photos. Basically we want as much control over the camera as we can. It as close to manual mode you can get to on a GoPro.
Manually setting White Balance will keep the colors more consistent between shots as lighting changes. 'Native' mode gives you the best options in post production.
If lighting is likely to change significantly, then you are better off leaving ISO in auto mode. But if you are looking to shoot predominantly during the day into dusk then setting an upper limit of ISO400 or ISO800 is a good option as the picture quality will be less grainy. If you were using a DSLR you would leave it in aperture priority mode and let the camera shutter speed adjust. A GoPro is essentially always in aperture priority mode with all HERO4 and HERO5 models having a fixed lens aperture of f/2.8.
Thus by setting an upper limit on ISO, this forces the camera to adjust shutter speed to achieve the exposure it requires which generally works well for time lapse.
Recommended Settings
Here are some recommended settings as a good place to start from. You won't see all the settings below until you enable ProTune. Remember, always take a few test shots to make sure it is looking as you want it.
To configure the settings on your GoPro HERO4:
- Hit 'Mode' -> Photo, hit the side 'spanner/wrench' button and you will have access to the following settings (in the same order).
- Hit 'Mode' to navigate down the settings. To change a setting, hit 'Shutter' to cycle through the various options. Then hit 'Mode' to move on to the next setting.
- Once complete, hit 'Mode' until you are at the bottom at 'Exit' and hit 'Shutter'.
You are now all ready to go. If you are using the CamDo Blink Time Lapse Controller, this is all you need to do on the camera, Blink will take care of the rest from here.
- Photo capture mode: Single
- Megapixels (MP): 12MP - W(ide). This gives you a wide Field of View and the ability to have a 4K time lapse movie at the end. If you don't need the full field, narrow it down to 7MP (M)edium. V5.00 of the H4 Black firmware also gives you the option to turn off the fisheye effect if you don't like that effect.
- Spot meter: Off
- PT (Protune): On
- White Balance: Native
- Color: Flat - this gives more flexibility in post production and captures more detail in shadows and highlights. The biggest difference is in the contrast, which is why the colors appear less saturated. The camera is attempting to retain a higher level of detail, but the result is an image that retains more image data for post production but doesn’t look as impressive. If you are not going to play with the color profile in post production, then set this to 'GoPro'.
- ISO Min: 100
- ISO Max: 400
- Sharpness: Low. This is a good option for high-resolution time lapse captures because it can make the transitions slightly smoother between frames. You can apply sharpening later with image editing software such as GoPro Studio, Final Cut Pro, or Adobe Premiere. If however you are not going to execute a lot of post processing, set this to High. If you do set it to High, don't re-apply sharpening in post production as this may cause artifacts.
- EV Comp: 0
- ISO Max: 400. This can be increased to 800 in lower light situations but it will also increase the noise (equivalent of graininess on film).
- ISO Min: 100
I know I may have said this once or twice already - but make sure to take some test shots and adjust settings if necessary. But if in the end you are really unsure, you can always turn off Protune mode and leave it in complete auto mode!
As always, we are keen to see the unique footage our customers achieve, so please send it in.
Other Resources
Here are some other useful resources you might find helpful.
- Time Lapse Infographic
- Time Lapse - Getting Started
- How to Long Term Time Lapse - Tips and Tricks - A Detailed Guide
- Time Lapse Blog Posts - check out some of the great footage captured using CamDo equipment.


