
A couple of years ago,Hugh McGregor of theAustralian Wildlife Conservancy asked if we could help him with his studies of feral cats by creating a controller for the GoPro camera that would be triggered by an accelerometer just when the cats pounce on their prey. We jumped on the opportunity to take on such a unique challenge.
Check out some of McGregor's work at 9:40
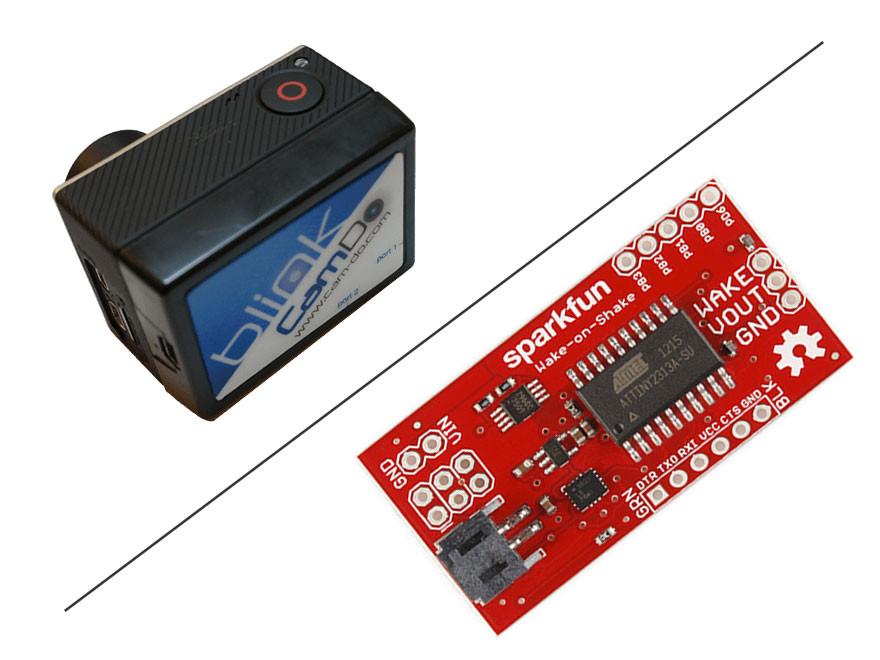
After some research (read about it here) we ended up integrating our Time Lapse controller board (now superseded by Blink - see below - but still available for a short while) with an accelerometer breakout board from SparkFun. The Wake on Shake is a breakout board manufactured by SparkFun Electronics which combines the ATTiny2313A with the ADXL362 low-power MEMS accelerometer. When powered, this board will go into a low power state until it is activated by a shake or bump. Once this happens, the board will power any electronics connected to it downstream.
Interfacing Wake on Shake to Blink
We decided it was time to unearth this project and adapt it for our newest camera controller, Blink (link to the original article).
One of the nice features about the Wake on Shake board is it’s ability to control the power of downstream components so that the minimum amount of power is consumed until an event occurs. This poses a slight problem since Blink determines the current time/date from the camera when it first receives power. That means the camera will have to go through an additional power on/power off cycle before powering on and taking an image. To circumvent this, we will utilize Blink’s motion detection mode and interface through Port 2.
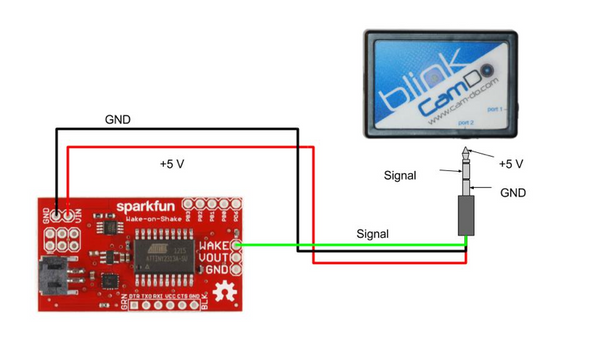
First, you will need to splice a standard 3.5mm audio cable (3 conductor) so that you can solder the conductors directly to the breakout board. Connect the conductors as shown in the image below:
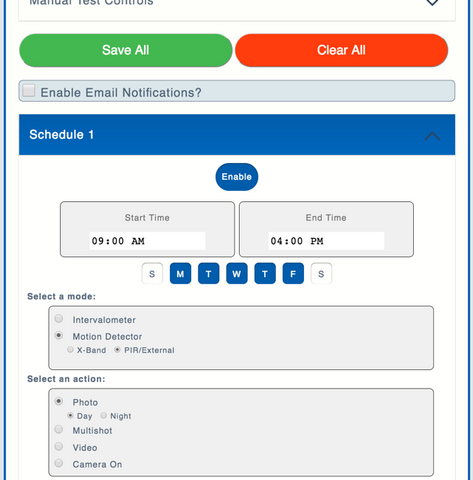
Next, connect Blink to either a camera or a USB power source and turn WiFi on. If you are unsure how to do this see Blink’s User Manualhere. Open the UI and set a schedule so that the Motion Detector is active and PIR/External submode is selected. See the image below for this configuration.
Once the schedule is enabled and saved you’re all set! To test, move the Wake on Shake board. You should notice the yellow LED on Blink light up and after a few seconds the camera will turn on and take an image.
If you want to change the threshold of activation for the accelerometer, we have some instructions here.
If you end up capturing any unique footage we’d love to see it. You can send images or video to marketing@cam-do.com.


