Our customers tend to runlong term time lapse projects with average durations of 6-12 months (or longer!). If you’re one of these people, you’ll likely experience the joys of dealing with the cold weather that accompanies winter months… and all of the challenges that come along with it. This can be a little daunting to wrap your head around for the first time. But not to fear! Keeping a few things in mind and a little bit of planning will result in a successful winter time lapse project. Here are the five things to consider when capturing time lapse footage during the cold winter months.
1. Manage the cold
It’s no secret that winter brings with it frigid temperatures. And cameras and batteries don’t play well with the cold. It’s likely you’ll need to manage this a bit to ensure there are no interruptions in your footage.
GoPro states that their cameras are designed for use in temperatures from 40°F to 110°F (4°C to 43°C.). However, we have had customers successfully use our solar enclosures in deployed in freezing temperatures. Although the cold or freezing temperature will significantly decrease the useful capacity of any lithium battery pack, our V44 battery packs will continue to provide power when slightly below freezing.
However, to prevent damage, the V44 battery will not recharge, such as from a solar panel, when well below freezing temperature (ie -20°C). Our Outdoor Enclosures do provide some insulation from the weather, keeping the system warmer than the ambient temperature outside. During the day when the temperature rises the battery will resume recharging.
If used in constant freezing temperatures, the interval cycle or amount of battery packs used should be adjusted to account for the lower useful capacity of the lithium battery packs due to the cold temperature.
One way to address this is to gently heat your batteries. But this can be a bit difficult to nail; whileheat is great for helping to keep the battery within the operational temperature range, the temperature difference can cause condensation issues. It also uses up precious power if you are on a solar deployment.
Our enclosures do provide a fair bit of insulation with the thick plastic. Although additional insulation can also be used around the battery since the low power consumption of Blink/BlinkX results in very low heat generated by the battery pack. Putting batteries inside a sock even can help provide an extra layer of insulation.
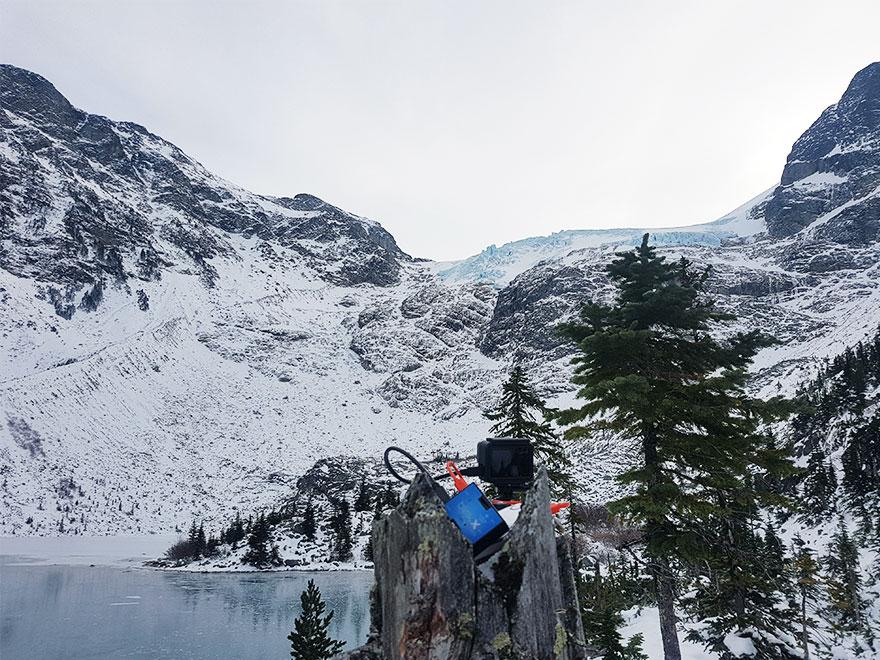
CamDo team member Yarin took BlinkX on a backcountry snowboarding trip, testing the unit out in -15°C temperatures. Read about it here.
2. Keep your kit free of snow
Snow or rain coupled with cold temperatures can result in snow/ice build up and potential lens blockage. This introduces a need to monitor and/or check your kit more frequently to ensure you’re not losing valuable footage.
If you’re able to utilize a kit that allows forremote status monitoring (i.e. CloudX Lite), it’s very easy to check-in to ensure your schedule hasn’t been interrupted. But that doesn’t help you to know if there’s anything blocking your lens. If you’re able to utilize automatic image upload (i.e. CloudX Pro), it’s easy to check your images frequently.
If neither of these options are available to you, it’s a matter of good old fashioned weather forecast tracking and frequent site visits. For example, if you know it snowed a few inches overnight, it’s time to visit your kit to ensure everything is working properly.
3. Stay on top of power
Shorter winter days produce less sunlight. And if you’re powering your long term time lapse kit with solar, you need to factor this into your workflow. As conditions change, it’s a good idea to check in with our time lapse calculator (specifically the solar irradiance section) to ensure you’re equipped with enough battery capacity with your current winter conditions. If you’re not, adding more battery capacity into your enclosure may be your next move.
This is another reason why having a kit with a remote status monitoring feature is beneficial (are you noticing a pattern here?!). With CloudX, you’ll get a daily snapshot so you know your system is still online.
4. Plan for harsh weather conditions, with the potential of condensation
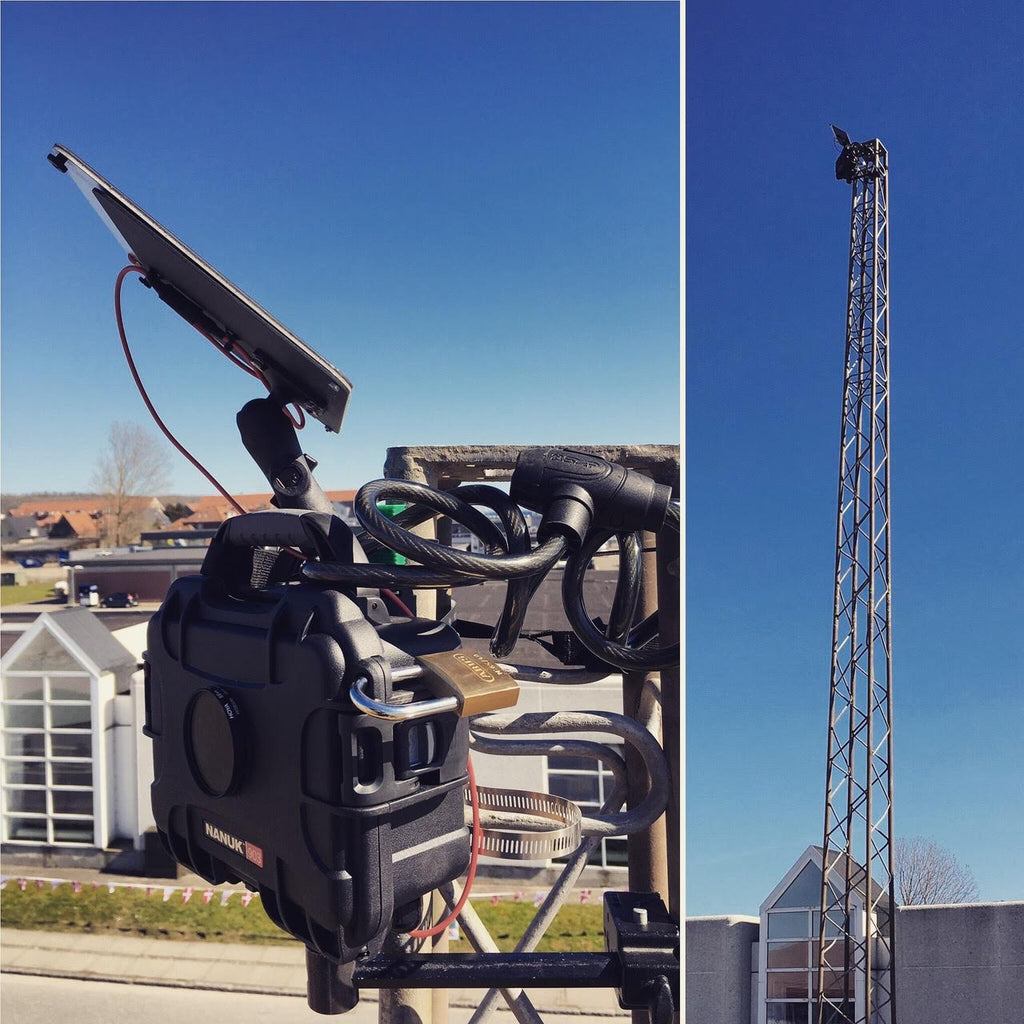
If you expect harsher conditions (temperatures, precipitation, wind) than you experienced in summer or fall, you should ensure you’re using a strong weatherproof case with a good IP rating.
By using ourSolarX orDryX weatherproof enclosures, your gear is sure to be protected throughout the winter months. The standard UV lens filter that is included is not waterproof, but can be replaced with another waterproof version if the enclosure needs to be mounted with a significant upward angle. If mounted horizontally or downwards, water ingress through the standard lens should not be an issue.
Derrick Lytle captures a Winter-to-Spring seasonal time lapse in Zion National Park backcountry.
Additionally, condensation can be an issue in these conditions. If your camera is deployed in a humid environment, adding a dessicant packet or two inside the enclosure is a great idea. Desiccant will absorb moisture from humid air being sealed in the box when you close it, which can result in condensation when there are temperature and pressure changes.
To further help manage the condensation issue, our enclosures have an integrated IP67 rated auto-pressure valve that equalizes atmospheric pressure difference to reduce condensation on the lens. This transfer of air through the valve also helps equalize the temperature differential between the inside and outside environment.
5. The simplest tasks become more difficult
This may be an obvious point, but you’d be surprised! In cold or wet temperatures, simple and easy tasks becomemuch more difficult with freezing hands or slippery surfaces. This is where planning ahead is your friend. Think about your photography site and plan for any condition that may arise.
If you’re unable to utilize cloud upload, it’s likely you’ll need to perform some manual management tasks. And depending on how your kit is mounted, you’ll need to ensure you’re able to access it safely. We’ve seen some pretty difficult-to-access kits on some customer construction projects. This may mean snow or ice removal before you’re able to reach the enclosure. You’ll want to factor this into your timeline (and potentially budget, if you’re hiring a snow removal service or similar).
If you’re opening the enclosure, you’ll want to take into account that you may be exposing your gear to cold and moisture when switching out memory cards, batteries, etc. You’ll want to ensure you have things like microfiber towels and a way to safely (and dryly) store equipment you’re swapping out so that no images are compromised during transfer. You also may want to invest in some winter photography gloves for the job.
The best way to decrease the number of times you need to access your kit (especially if you have one of those difficult-to-access examples mentioned above) is to utilize CloudX Pro for its remote status monitoring and cloud upload capabilities. The fewer times you need to access your kit will increase the likelihood of things going wrong due to harsh weather conditions.
A little forethought and planning will go a long way in your winter time lapse photography projects. What are some of your go-to tips and tricks that aren’t included here? Leave them in the comments below.