Solar & Dry Enclosure Set-Up Guide
CamDo Solutions SolarX & DryX Enclosure Setup Guide

1. Introduction
This guide describes how to setup your CamDo solar enclosure. In addition to setting up your equipment, please make reference to our comprehensive time lapse guide, "How to Time Lapse" here. In particular, please make reference to Composition to make sure you are shooting what you want to shoot and the time lapse calculations and associated camera settings.
Below is a setup video for our outdoor enclosures. You can also view other helpful instructional videos in the “Support” section.
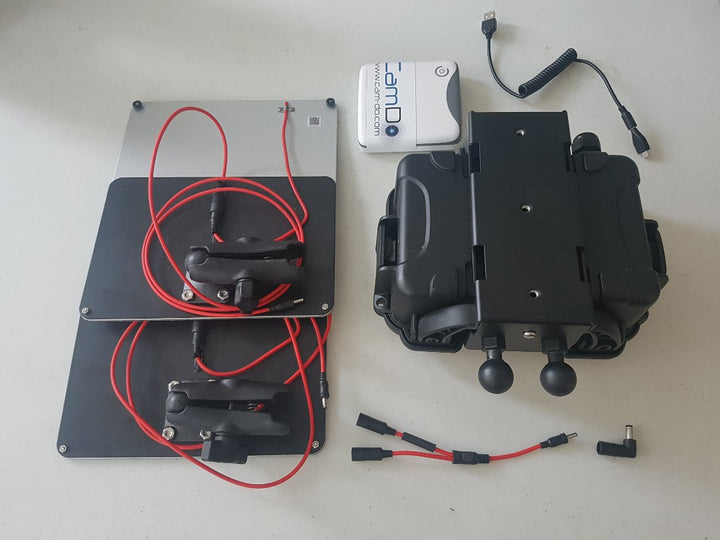
2. Package Contents
DryX with V50

- DryX Enclosure
- 67mm threaded lens
- V50 battery pack
- V50 USB charging cable
- External power wire
-M to F 3.5x1.1mm barrel - V50 charging adapter
-F barrel to microUSB - USB charging adapter
-M barrel to USB-A
Solar Panel Kit

- Solar Panel
- Ball-socket arm
- Splitter cable (2Fx1M)
- 1" ball mount (¼"-20 thread)
- Lock washer
Swivel Mount Kit

- Mounting base with Swing Arm
- Ball-plate with 2.75" spacing
- 2x ¼"-20 Flathead screws
- Optional Replacement Nut for Ball-socket (width:9/16" thread:5/16"-18)
- Optional Replacement nut for Swingarm (width:9/16" thread:3/8"-16)
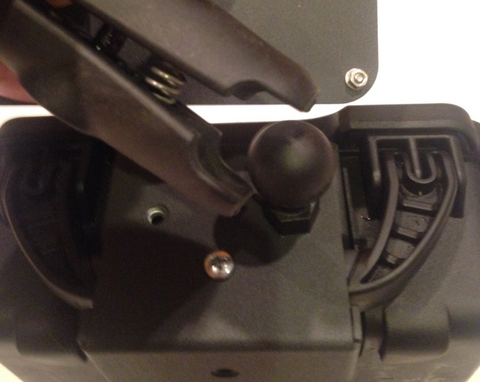
3. Enclosure Assembly Instructions
The V50's Always On mode is automatically enabled when a USB output cable is connected.
The V44 and V15 need to have the Always On mode manually enabled/disabled. When the battery is disconnected (not charging), press and hold the power button for 6 seconds to change modes. If the charge indicator flashes 3 times and stays lit for a second or two, you are now in Always On mode. If the charge indicator flashes 3 times and then goes dark, you are now in Auto Off mode.
The power connection will vary based on the CamDo controller and GoPro camera in use. If using a HERO3/3+, it is recommended to use a H3 Battery Eliminator.
Note: our legacy (discontinued) Dry-H3 & Solar Enclosures do not have an auxiliary bracket and only fit the HERO3 & HERO4 cameras.
Note:If using more than one solar panel, refer to the section on connecting two solar panels.

NOTE: If using multiple battery packs, refer to the section on connecting battery packs in parallel.
The enclosure is fitted with a standard 67mm threaded filter adapter (or 55m for the Legacy Solar-9W). Optionally, you can replace the neutral-density lens with your optical filter of choice.

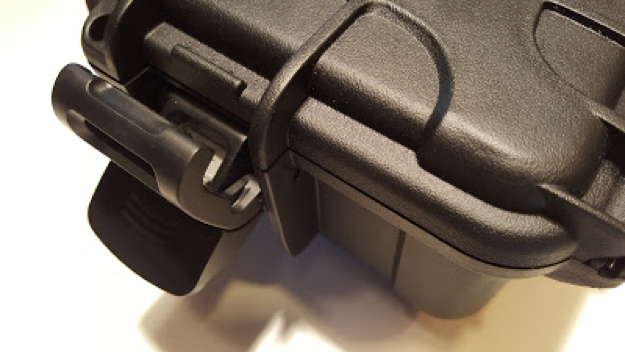
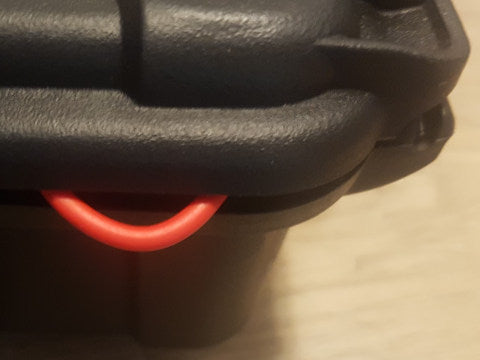
NOTE: The enclosure latches can exert extreme force. Cables or debris obstructing the lid may result in damage or prevention of a weatherproof seal.
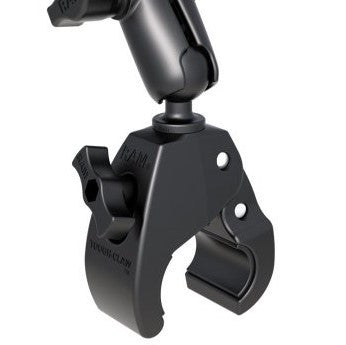
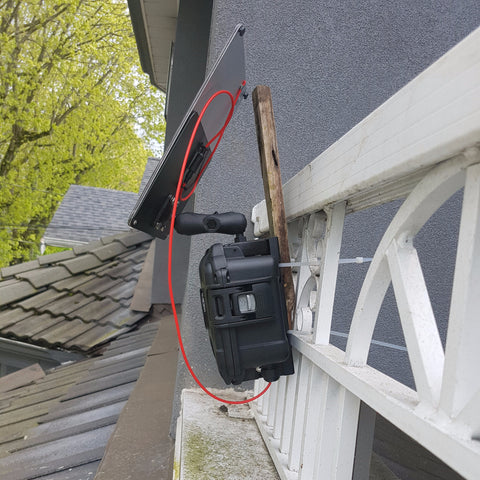
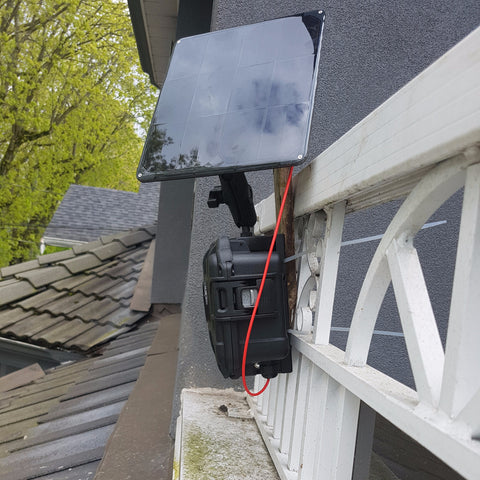
Alternatively, use another 1" ball mount such as our Tough Claw (purchased separately) to attach the solar panel further away from the enclosure for better sun exposure.
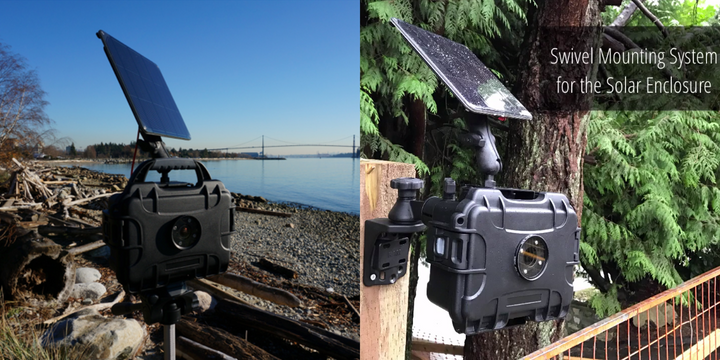
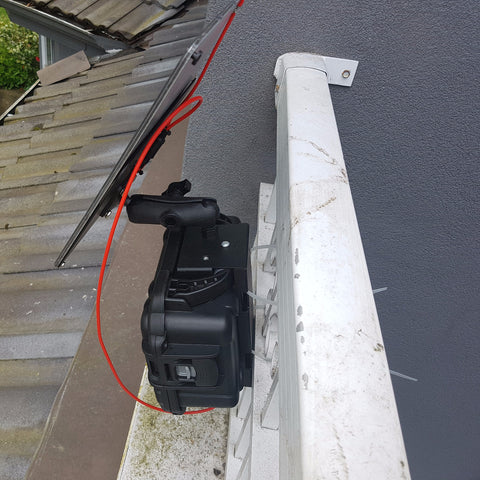
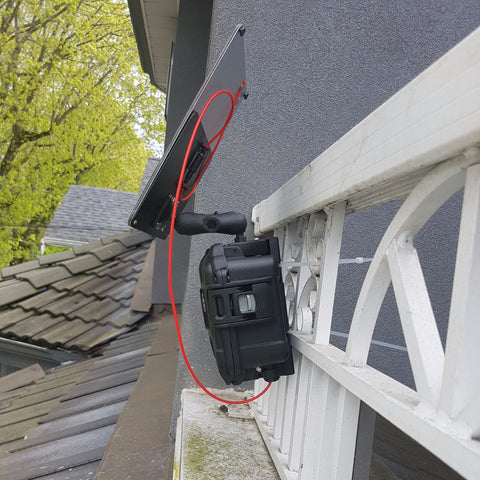
We also offer a high-quality swivel mount bracket (purchased separately) that matches the 2.75" hole spacing at the back of the enclosure's mounting bracket. The swivel arm allows for full 360-degree rotation and the ball and socket system allows a 360-degree rotation for fantastic aiming flexibility when attached to a flat or round surface.
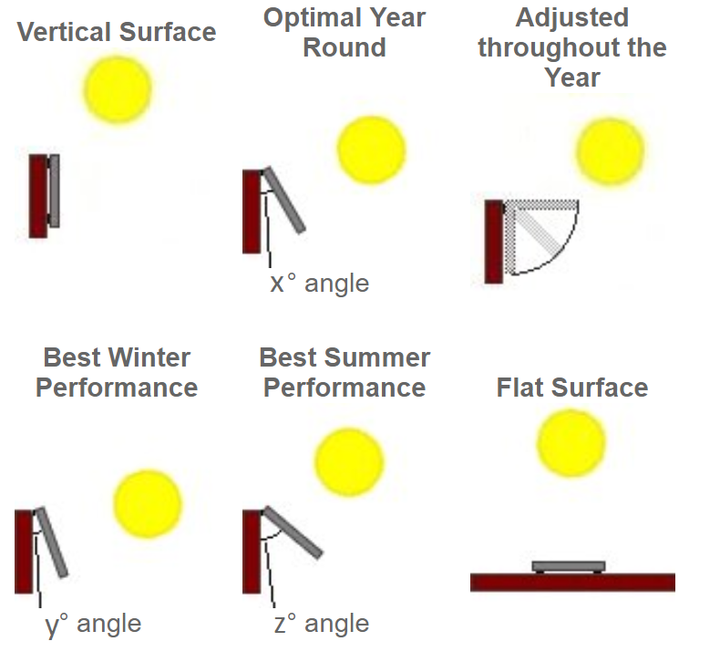
Check the Solar Irradiance Calculator for determining the optimal angle for your solar panel. The average Solar Irradiance varies throughout the year depending on the seasons. If your project spans over a year and you will not be occasionally adjusting the panel angle, we suggest using the "Best Winter Performance" angle as the winter months will require the most solar collection since there is less light available throughout the day.
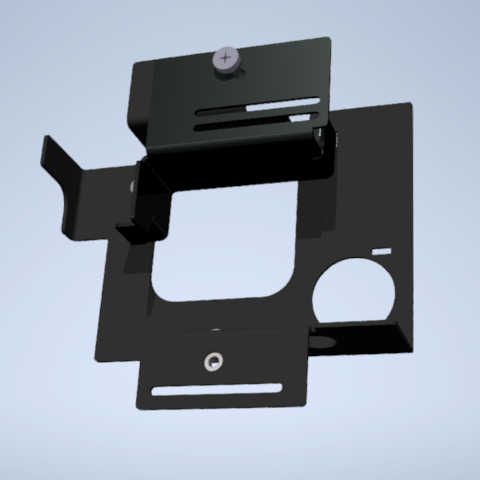
4. Camera Bracket Assembly Guide
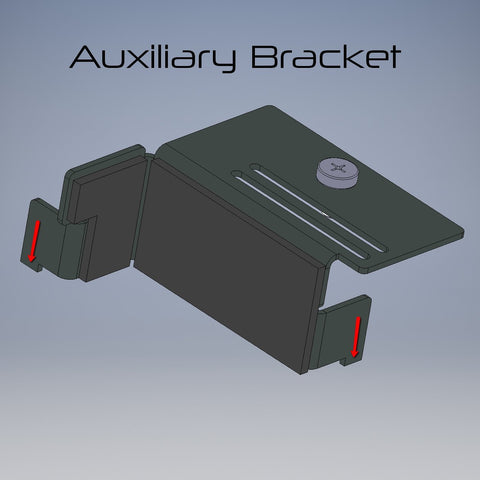
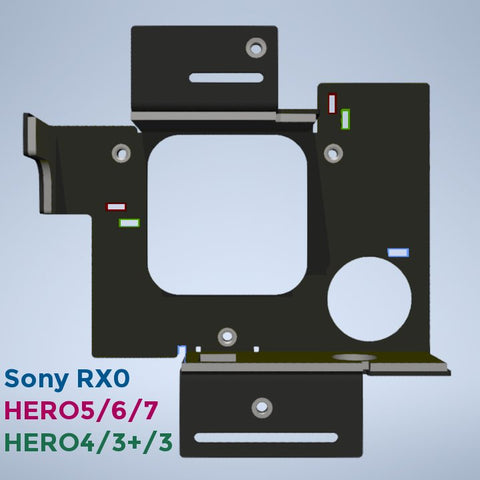
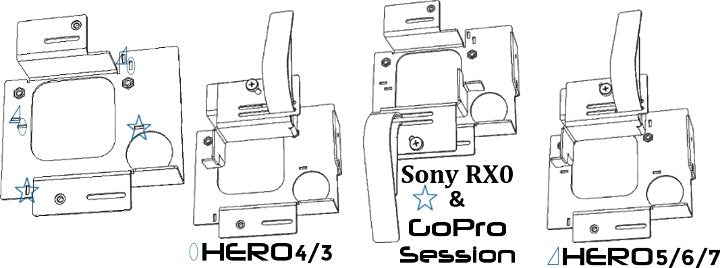
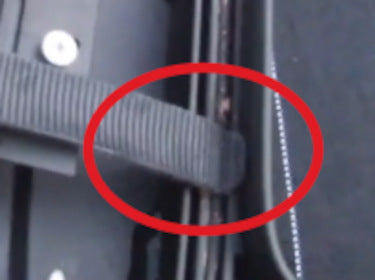
Slide the velcro strap to the edge of the Auxiliary Bracket. Use a screwdriver (PH1) to loosely connect the screw of the Auxiliary Bracket to the top flange of the main Camera Bracket. Align the legs of the Auxiliary Bracket with the upper keyholes of the Camera Bracket that correspond to the HERO5-Black camera position before tightening the screw.

Slide the velcro strap to the middle of the Auxiliary Bracket. Use a screwdriver (PH1) to loosely connect the screw of the Auxiliary Bracket to the bottom flange of the main Camera Bracket. Align the legs of the Auxiliary Bracket with the keyholes of the Camera Bracket that correspond to the RX0/Session camera position before tightening the screw.
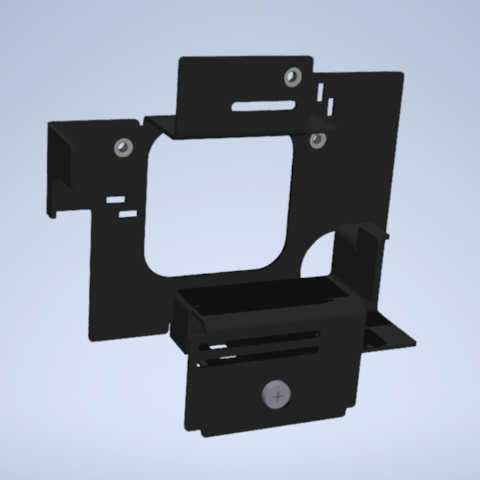
Use a screwdriver (PH1) to remove the Auxiliary Bracket from the main Camera Bracket. Wrap the velcro strap through the slot in the top flange on the main camera bracket
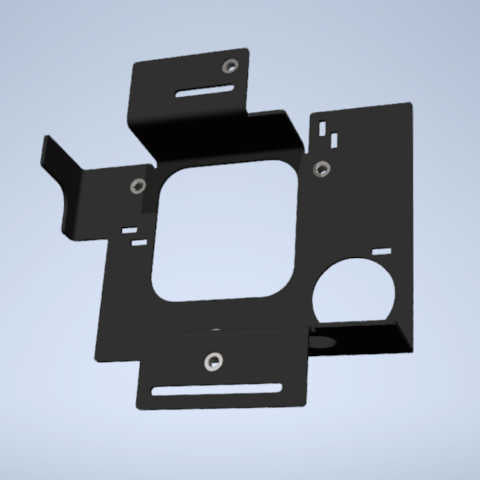
Slide the velcro strap to the edge of the Auxiliary Bracket. Use a screwdriver (PH1) to loosely connect the screw of the Auxiliary Bracket to the top flange of the main Camera Bracket. Align the legs of the Auxiliary Bracket with the lower keyholes of the Camera Bracket that correspond to the HERO4&HERO3 camera position before tightening the screw.
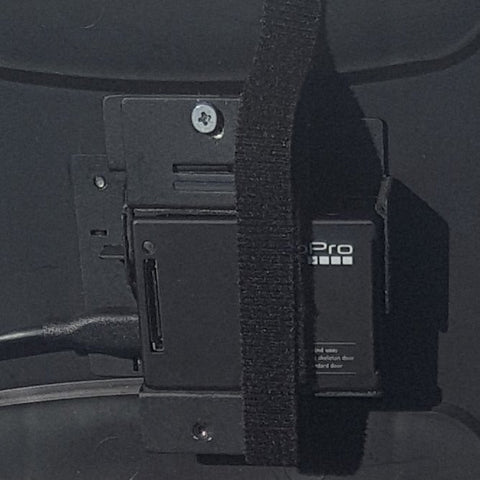
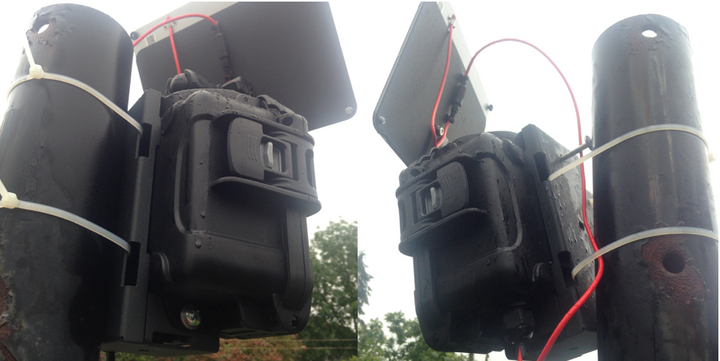
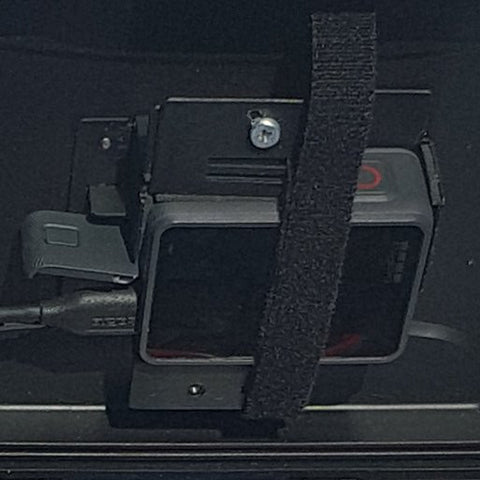
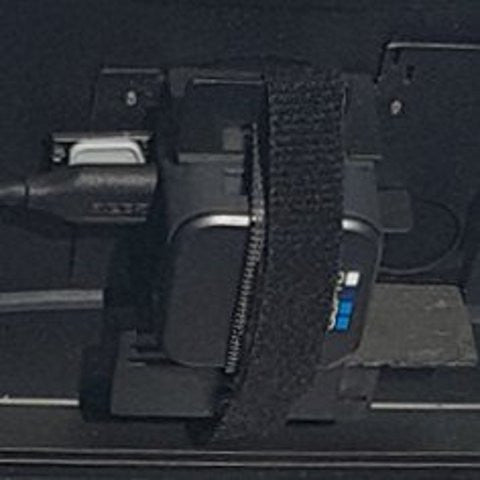
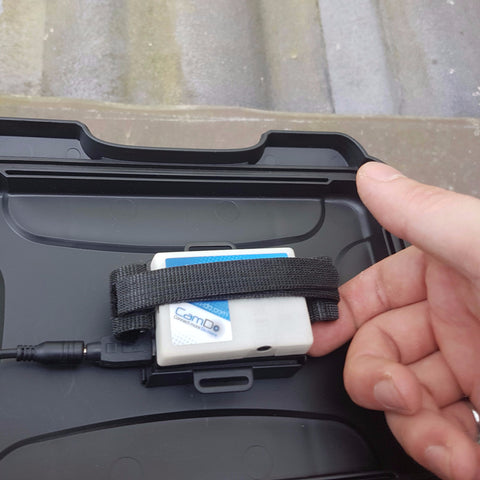
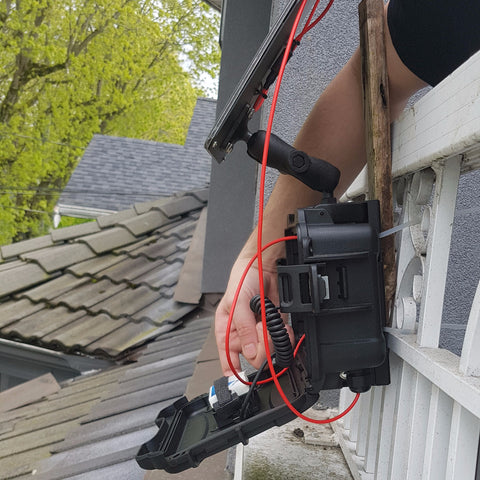
5. Arranging the components within the weatherproof enclosure
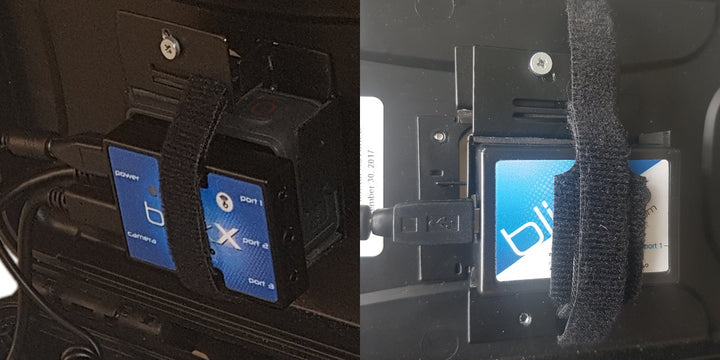
The following photo shows how to arrange the various components within the weatherproof DryX enclosure. This particular image shows the use of the Sony RX0 camera which is a slightly tighter fit that the GoPro due to the cable positioning.
Note the use of the USB extension cable that ships with UpBlink to enable more flexible position of any USB modems you may utilise.

6. How to Connect the Swivel Mount Kit
Our Swivel Mount Kit can be used to attach the Enclosure to a wall or pole and easily adjust the camera's field of view. The swing arm pivot allows for full 360-degree rotation and the ball and socket system allows a 360-degree rotation with a 180-degree pivot.


TIP: The GoPro App, allows for using the GoPro's WiFi signal to provide a live preview of your camera's view on your smartphone/tablet

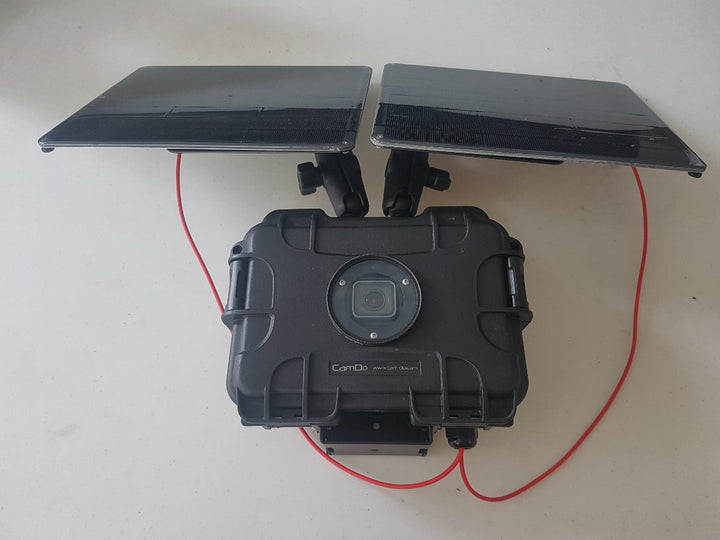
7. How to Assemble SolarX with Two Solar Panels
Our Blink and BlinkX time lapse controllers conserve power by turning the GoPro camera off between intervals which can allow for the system to run continuously with the use a solar panel. However, if you are running a power intensive schedule (short intervals or recording video clips) or powering a peripheral device (mobile hotspot) you may require an additional solar panel. Connecting two solar panels can double your recharge rate, to ensure that on average you consuming less power in a day than can be collected from the sun.


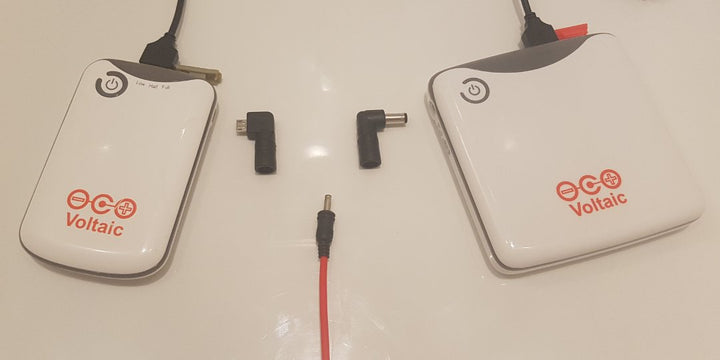
8. How to Connect Two Battery Packs in Parallel
If your deployment area is frequently cloudy/raining resulting in longer periods without recharging, you may consider adding an extra battery pack to your system. CamDo's Outdoor Enclosure can fit upto two V50 battery packs, two V44 battery packs or three V15 battery packs. Adding an extra battery pack to your system will increase your total capacity to allow for longer capture between charges. When using solar panels, the extra battery capacity gives you peace of mind, as it provides a deeper reserve to power your setup when the bad weather rolls in.
The V50, V44 and V15 battery packs can be connected in series or parallel using the cables provided with each individual battery pack. However, connecting the battery packs in parallel is a more efficient circuit since it removes an extra charging circuit (one battery charging from the other) from the system which introduces an additional source of electrical inefficiency. The instructions below show how to connect your battery packs in parallel.
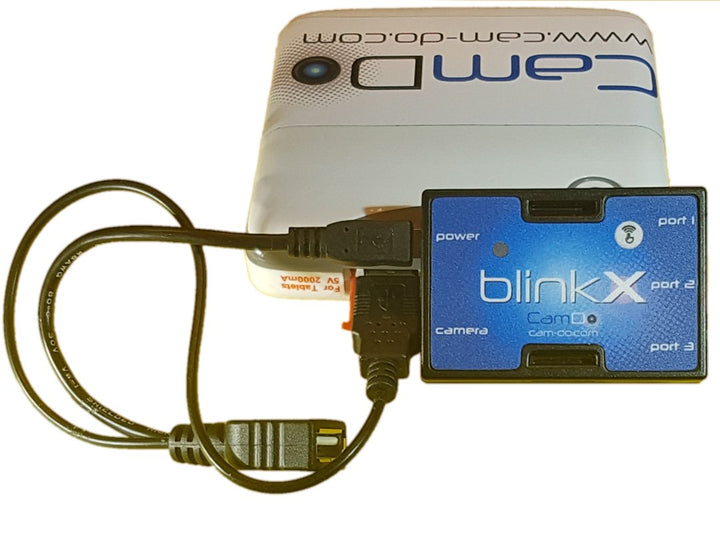
Connect the USB multi-cable to the output of each battery pack. If using the V44, use the 2000mA port labeled "For Tablets".
Use the splitter cable with two male ends to connect to each USB multi-cable. Connect the single female end of the splitter cable to the appropriate USB adapter for your CamDo controller. BlinkX uses the microUSB adapter, while Blink uses the miniUSB adapter.

Use the splitter cable with two male ends to connect to the appropriate charging port adapter for your battery pack. The V44 uses a (M5.5x2.1mm) barrel adapter, while the V50 and V15 uses a microUSB adapter.
Connect the single female end of the splitter cable to the external power cable. The external power cable can be connected to either a solar panel or USB wall adapter.

See our Guide to Connecting Multiple V15 Battery Packs for connecting three V15 battery packs in parallel.
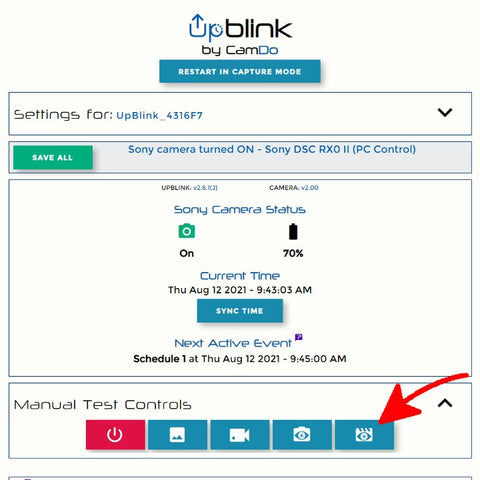
9. Frame the Shoot with the Sony Camera and UpBlink
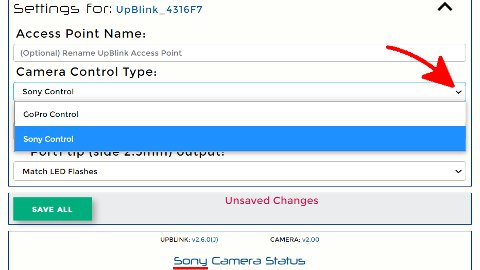
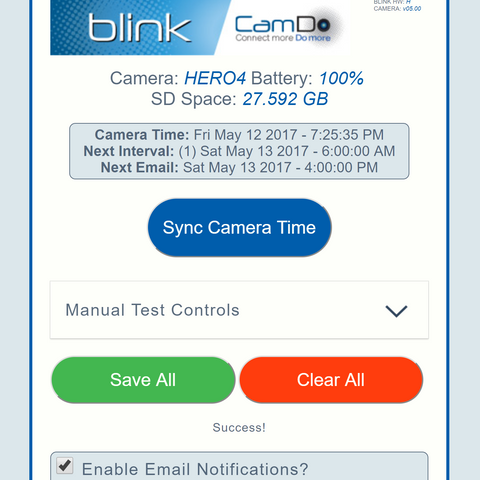
When UpBlink is used with the Sony RX0 camera (or another Sony camera with "PC Remote" USB control mode) a low resolution view of the camera's field of view can be loaded into the UI via the Manual Controls menu.
MENU →


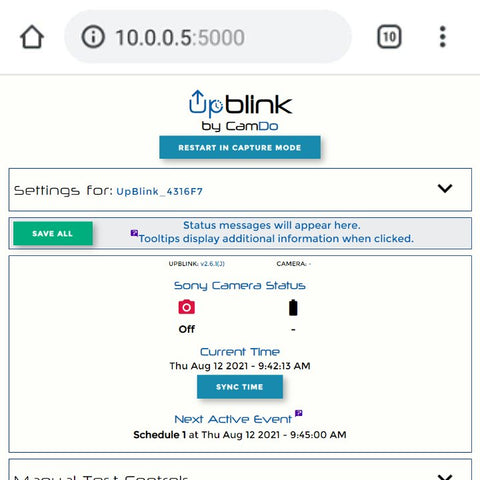
The currently selected camera control type is shown in the Camera Status container at the top of the UI.


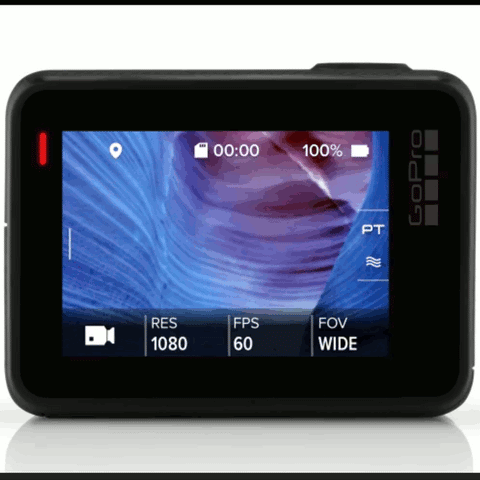
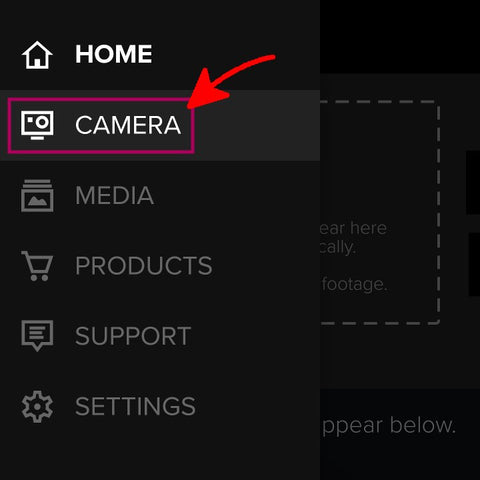
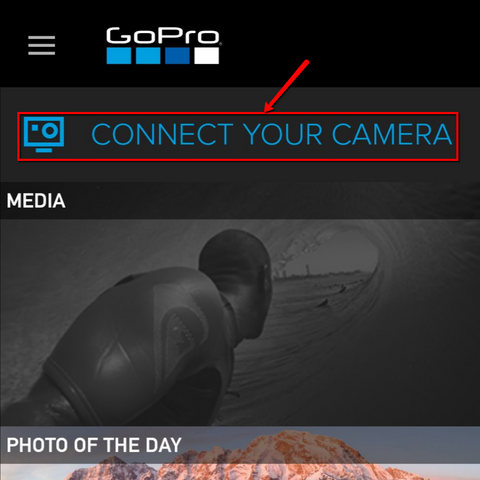
10. Frame the Shoot with the GoPro App
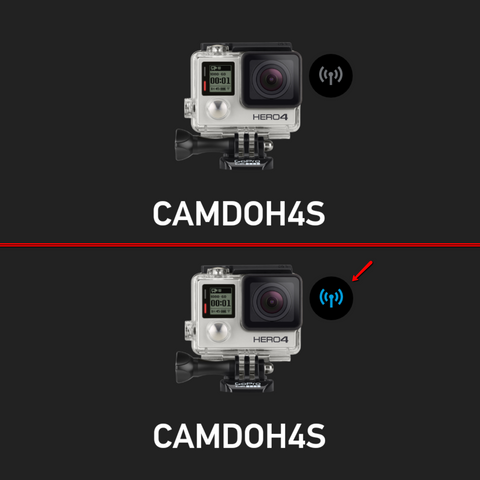
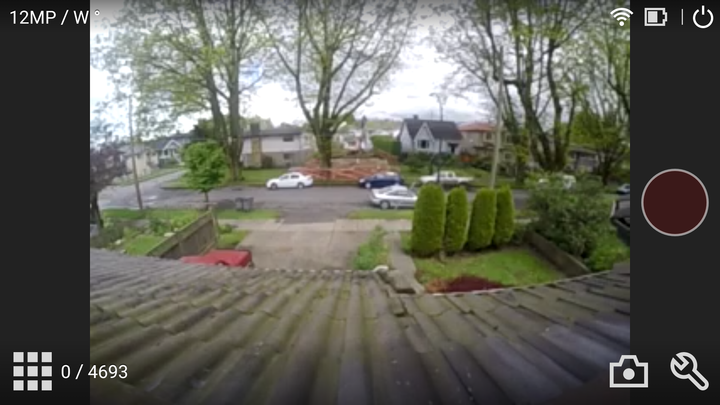
The GoPro App, allows for using the GoPro's WiFi signal to provide a live preview of your camera's view on your smartphone/tablet. This live preview can be helpful to assist with perfectly framing your camera's position for your shoot. Ensure to turn off the GoPro's WiFi after securing the camera to conserve power.
10.1 Framing GoPro's view with BlinkX and UpBlink
BlinkX cannot activate the WiFi signal of a GoPro that has not yet been paired with the GoPro App.
Camera pairing instructions can be found on GoPro's website here.


Once the perfect shot has been framed, ensure all fasteners are tightened and the enclosure is secure.


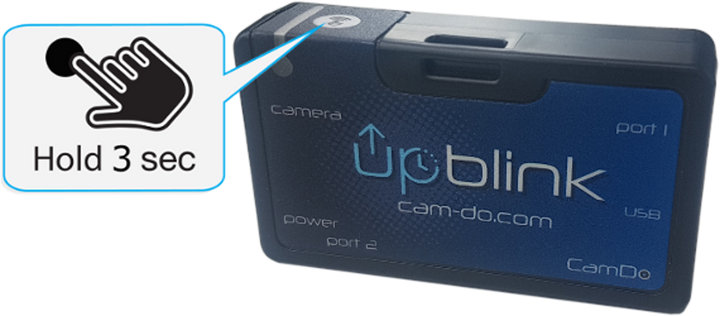
Optional: Open the enclosure to turn off BlinkX's WiFi. To conserve power, the BlinkX WiFi signal will automatically turn off after 5minutes of inactivity.
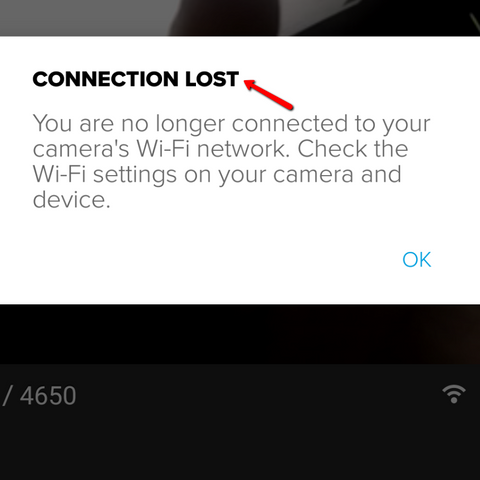
10.2 Framing the GoPro's view with Blink
Camera pairing instructions can be found on GoPro's website here.

Within a few seconds of turning the GoPro's WiFi on, you should see your camera's WiFi network is available to connect to on the GoPro App.
Once the perfect shot has been framed, ensure all fasteners are tightened and the enclosure is secure.
11. How to Download Footage
There are multiple options for downloading time lapse footage from your GoPro camera outlined on the following pages:
